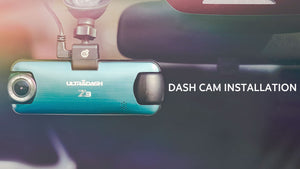
7 Easy Steps to Install a Dash Cam Yourself
Dash cams have now become a must-have product for every car. It is also an especially important thing to replace the old low-quality dash cam in a timely manner. Do you feel frustrated and have no idea how to deal with the installation and hide its cable? This article can help save you extra money without going to an installer.
Today, we will show you how easy to install a dash cam in 7 simple steps! Easy installation with excellent quality. Let us do it together!
Preparation before installation
Dash Cam / Car Power Cable / Suction Cup Mount / Adhesive Mount / Static Side Film / Cable Clips / Cleaning Liquid / Wipe

Step 1: Test The Device
Plug in the dash cam first to confirm whether the device can work properly.

Step 2: Confirm The Installation Spot
Connect the magnetic mount to the device and start the engine. When the car power cable is plugged in, watch the screen, and find a location to be installed. It is recommended to install it behind the rearview mirror for blocking the driving view. In addition, do not choose the black dotted area to use the suction cup mount and static side film. Because the surface is not flat and smooth, the suction cup and the static side film will not be able to absorb or attach in this area and avoid choosing the edge of the black dotted area. But luckily, if you insist to put it right here, you can still use the adhesive mount to stick directly on this area.


Step 3: Cleaning
After selecting the installation spot, use a wiping cloth to clean the location to be attached. If the location is oily, it can be wiped with cleaning fluid.

Step 4: Paste the static side film
After cleaning, you can paste the static side film. Using this film can protect your windshield or tint, and it is also convenient to change the position or remove it in the future but remember that this film can only be pasted on the glass. It cannot be pasted on black dotted area, plastic, or window defroster because the surface is not flat and smooth. If you want to use the adhesive mount to stick it on plastic or black dotted area, you can do it directly without the static side film.

Step 5: Attach the bracket
Remove the protective film on the suction cup/Adhesive mount and attach the bracket on the static side film. If you use the adhesive mount, it is recommended to keep pressing for 30 seconds after pasting to ensure the complete attachment.

Step 6: Hide And Trim The Cable
Insert the power supply into the magnetic mount and hide the car power cable into the roof liner.

Gently remove the waterproof rubber strip on the side of the door and remove the A-pillar trim cover with a little force.

Then hide the cable in the gap in front of the A-pillar. Do not across the airbag.

Along the edge of the A-pillar, tuck the wires into the trim.

Tuck the wires into the gap of the waterproof rubber.

Put the waterproof strip back in place.


Run the cable along the edge of the passenger seat until the charger is inserted into the 12 volt socket (cigarette lighter).

Hide the wire inside the trim panel or use some cable clips to fix it on the panel.

Arrange the wire and place the excess wire under the carpet.

Now the hiding cable part is complete.
Step 7: Install the dash cam and adjust the angle
Connect the device on the mount and loosen the locking ring of the mount. Start the car engine and the device will turn on automatically and use the screen to adjust the shooting angle. After adjustment, tighten the locking ring.

Congrats! Now you are all done!
This dashcam installation instruction is for your reference only, if still not sure about the installation process, please consult a professional installer or vehicle technician to start the installation instead of doing it yourself.
Learn more:
UltraDash C1. The Best Value For Your Money
7 Reasons Why you need a Dash Cam
7 Easy Steps to Install a Dash Cam Yourself
How to Hardwire Dash Cam Installation Guide Step-by-step
The 5 Myths of Wi-Fi Function on Dash Cams
How to Use OTG Device with Phone to Watch, Edit and Share Dash Cam Footage
Four Factors that Affect GPS Logger Positioning Quality of Dash Cams
Five Key Points of Choosing a Dash cam for Ridesharing Taxi, Uber and Lyft Driver
Five Simple Ways To Troubleshoot Common Dashcam Glitches
Does TESLA need an additional dash cam?
Easy Installation Of 3M Adhesive Dash Cam Bracket + Static Side Film
How to Reduce Jello Effect Caused by Car Vibrations in The Footage Recorded by A Dash Cam?

