How to Use OTG Device with Phone to Watch, Edit and Share Dash Cam Footage
What is an OTG / On The Go adapter (OTG adapter or OTG connector)?
Preface:
USB OTG (On-The-Go) adapter/connector is a standard USB specification dongle used on a mobile device as an adapter for an SD card, Micro SD card, and devices such as flash drives are used for data transfer and viewing. Put it when the mobile device is plugged into the OTG adapter, inserting the memory card into the OTG card reader, the user can then directly read the data in the memory card on the mobile device, saving a trip of going home and checking the data through the computer. Why do we recommend using an OTG adapter card reader? The advantage of using an OTG adapter is that you can use OTG to transfer data from the dash cam anytime, anywhere when you have a mobile device. That is more stable and faster than Wi-Fi dash cams that use wireless technology. Related articles: THE 5 MYTHS OF WI-FI FUNCTION ON DASH CAMS
Whether it is Apple iOS or Google Android mobile phone/tablet while using the OTG adapter, be sure to check if the device itself supports the OTG function. Users must purchase an OTG adapter separately when connecting with different memory cards. Related articles: 6 TIPS TO SELECT THE BEST SD CARD FOR YOUR DASH CAM
Note: Most new mobile devices or tablets support OTG function, but not all mobile devices or tablets have OTG function. If you want to confirm whether your device has an OTG setting, the user can go online to check if your model is supported.\
Note: Regarding the choice of OTG adapter, currently, we do not have a recommended brand or model. Please check online reviews and make purchases if you have an interface that supports your mobile phone. If a newer device, it should all use USB Type-C; if it is an old iPhone, it is the Lightening interface, If it is an old Android, it is Micro USB. Be sure to check the connection type on the mobile device.
Three minutes quick guide: How to use OTG to watch, edit and share videos footage (iOS/Android)
Preparation:
iOS or Android Mobile Device / OTG adapter / Dashcam’s Memory Card
If you are an iOS Apple user, click here to go directly to use on Apple’s iOS device.
For Android device
Step 1: Connect mobile phone and SD card via OTG
Insert the SD card into the OTG adapter, then plug the OTG into the phone.

Note: When you have a memory card of 64GB or more or an SDXC memory card, if your phone does not support exFAT format, a prompt will pop up asking you to format the memory card; please do not format. At this point, you need to go to the Google Play store to download an App: exFAT/NTFS for USB by Paragon Software. Step-by-step guide How to download purchase the exFAT format in the App after completion. The price is USD 5.99. After that, your device can now support all SDXC memory cards typically. However, some mobile devices come with this format itself. For example, iPhone and some High-end Android phones. (If this format is already installed on your mobile device, please skip this paragraph, and go to step 2).
Here's how to download "exFAT/NTFS for USB by Paragon Software" and purchase the exFAT format:
Open the Google Play Store.

Type exFAT/NTFS for USB by Paragon Software in the search bar, click "Install,” and click "Open" after installation.


After entering the App, swipe to the bottom, you will see "I AGREE.” Please check “I AGREE” this action will be repeated twice, then it will pop up whether to allow notification for the APP on your device, depending on whether you allow it or not.


After clicking, you will go to the Volumes page, and there will be three bars hidden menu icon on the upper left.

After clicking on the hidden menu, press "Purchases" there is an exFAT on the entry page; click on "BUY: $ 5.99" (The price here is in US dollars), a small window will pop up, then click "Buy.”
Note: If your mobile device does not support exFAT format nor FAT32 format, please press "BUY: $9.99" (The price here is in US dollars) when purchasing this value pack can help you save a little money.


After the installation is complete, insert a memory card above 64GB into the OTG device. The device will pop up a small window to allow and opens; please click "OK" for both. You will see the name of the memory card. If the memory card is used on our UltraDash dash cam, the name will be "ULTRADASH.”


A small window to confirm allow access on the device will pop up again; please click "Allow.”

You will see the name of the SD card disk. After pressing "OPEN,” the installation prompt of another File Management App will pop up again. At this time, press "OPEN GOOGLE PLAY.” We’ll also need to install the (Total Commander – file manager) in the Google Play Store. Please click "Install" after installation is complete, click on the app to open the SDXC memory card with 64GB SDXC or higher.


Step 2: Open SDHC memory card file
If the phone has FAT32 and exFAT format, please follow the steps below to open the SDHC memory card file.
There will be a USB connection icon on the mobile device. Click on the notification bar icon above and press "USB Flash Drive," then click on the hidden three bars menu (Hamburger menu) on the upper left corner "File" to open it; in the menu, The name of the USB device will appear.
Click to open the notification bar.

Click to open the “File” App.


If the mobile device does not have FAT32 and exFAT format, please follow the steps below to open the SDXC memory card file.
Click on the Microsoft exFAT, NTFS for USB by Paragon software App; you will enter the Volumes page; please click "MOUNT,” after pressing MOUNT, another page will appear; please click "OPEN.”


Step 3: Select the file and download it
If the mobile device has FAT32 and exFAT format, please follow the steps below to open the SDHC memory card file.
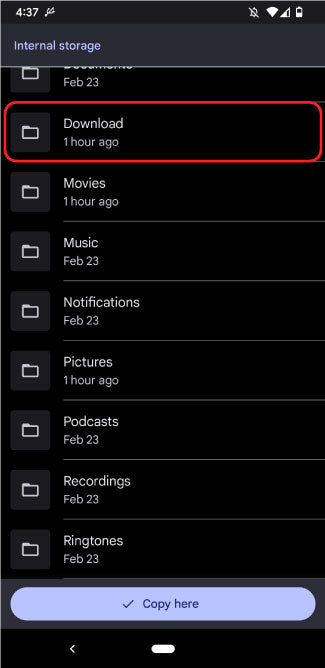
Once the SD card folder is selected, three folders will appear, PHOTO, PROTECTED, and VIDEO. Select the VIDEO folder and click the desired file. After the file is opened, click the three-dotted menu (dotted menu) on the upper right, click to open, and click Download; the video footage will be moved to the download album.


The differences between the three folders are as follows:
PHOTO: All photos.
PROTECTED: Video files stored by G-Sensors or Manually Locked.
VIDEO: All Video files (Exclude Protected/Locked files).
Note: If you want to download other files from these folders, you can follow the above method for a successful download.
If the mobile device does not have FAT32 and exFAT format, please follow the steps below to open the SDXC memory card file.
Go directly to App “Total Commander – file manager,” click on the video folder and select the video you want to save, a menu will appear, click on “Copy/Move/Transfer via Bluetooth,” and the copy will pop up /Move the small window, click the "Move" or "Copy" option, the video will be saved to Download.


The differences between the three folders are as follows:
PHOTO: All photos.
PROTECTED: Video files stored by G-Sensors or Manually Locked.
VIDEO: All Video files (Exclude Protected/Locked files).
Note: If you want to download other files from these folders, you can follow the above method for a successful download.
Step 4: Open download video
Click on Album; the video will be in the Download folder; click on the video you want.


Step 5: Watch the video
Select the video and watch. If you want to jump to a specific time frame, swipe the time bar to move to the frame you want!

Step 6: Editing
First, watch the video; there are four options below; please press edit to enter, drag the left and right video time bar. You can accurately capture the time range they want. When you wish to adjust the screen, there are also cropping, adjustment, etc., next to the video functions available for you to use.


After the video is edited, just press save a copy, and the edited video will also appear in Download.
Step 7: Share or Upload
There are four options below the watch video; please press share to enter, click the app you want to share, or upload with others. This is how to share the video with others.


For iOS devices
Step 1: Connect mobile device and SD card via OTG
Insert the SD card into the OTG adapter, then plug the OTG into the phone.

Step 2: Open the file
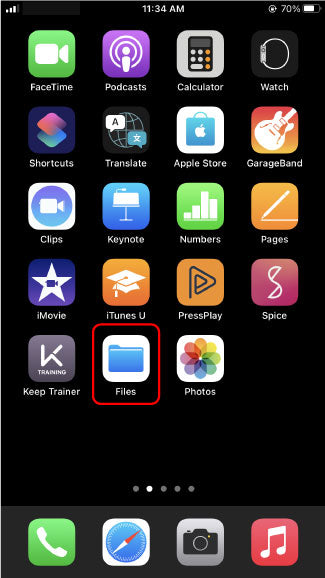
On the iPhone, menu Open the "Files" app.

Step 3: Click on the USB device
After clicking on the “File” app, you will see the name of your OTG connected SD card location. Please click on it.

Step 4: Open the folder
After selecting the SD card folder, there will be three folders PHOTO, PROTECTED, and VIDEO.

The differences between the three folders are as follows:
PHOTO: All photos.
PROTECTED: Video files stored by G-Sensors or Manually Locked.
VIDEO: All Video files (Exclude Protected/Locked files).
Step 5: Save video to Phone Album / File Location
Save to "Album"
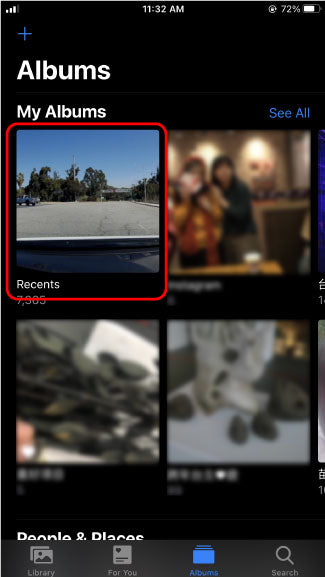
Click on the VIDEO folder to select the video you want to save, enter the viewing screen, press the share button in the lower-left corner; you will see the option “Save Video,” click on it, and go back to Album to watch it. You should find the videos in “Recants” Items.


Save to "File"
In the VIDEO folder, click the option button on the upper right. There will be a ”Select” option; you can click a single video or multiple videos at a time, click the “Move” icon in the bottom menu, and select Videos stored in Drive, iCloud Drive, or My iPhone in the file.


Step 6: Watch the video in the Photo Album / File
Watch videos file in "Albums"
Press on “Photo,” click on the “Recants” tab, select the video you just downloaded, enter the viewing screen, and press “Play” to watch it. If you want to jump to a specific time, swipe the time bar at the bottom to move to the time frame you want.


Watch videos file in "Files"
Press on “Files”, find cloud drive/iCloud drive/On My iPhone where the video was downloaded. Select the video you want to watch, and then click the video directly after entering the viewing screen to watch it. If you’re going to jump to a specific time, swipe the time bar at the bottom to move to the time frame you want.


Step 7: Edit in Phone Album / File
Edit in "Album"
You can directly click on the video you want to edit in the video folder, click it, you will enter the video, there will be “Edit” in the upper right corner of the screen; please select the “Edit” button.


After pressing the “Edit” button, it will enter the video length screen drag the time bar left and right, to capture the time range you want. After selecting the time range, press "Done" and "Save Video as New Clip.”


Edit in "File"
Press on “Files”, find cloud drive/iCloud drive/On My iPhone where the video was downloaded. Click on the video you want to edit; you will enter the video screen; there will be a “Crop” icon in the upper right corner.
Note: Videos stored in Google Cloud cannot be edited, only view or share.


Once enter the “Crop” screen, drag the time bar left and right, to capture the time range you want. After selecting the time range, press "Done" and "Save Video as New Clip.” The file will save directly to the folder, and you will see a clip video file with the same name as the original file but with a “copy” written on the back.


Step 8: Share or Upload on Album / File
Share in "Album"
Click on “Photo,” go-to “Recants” select the video you want to share; there will be a share button in the lower-left; click on the app and the person you want to share. Now your video is ready to be shared.


Share in "Files"
Click on “File”, go to Cloud Drive/iCloud Drive/My iPhone folder where the video was downloaded. Select the video you want to share; there will be a share button in the lower-left; click on the app and the person you want to share. Now your video is ready to be shared.


Conclusion
It is very convenient and straightforward to use an OTG device. It saves you the trouble of connecting to a computer. If there is an OTG device, you can connect as you like when you encounter a UFO, car accident, or need to upload a backup or share those video footage with your family, friends, police, or insurance companies. You can quickly share the video with your family and friends. It makes our lives more convenient!
Learn more:
UltraDash C1. The Best Value For Your Money
7 Reasons Why you need a Dash Cam
7 Easy Steps to Install a Dash Cam Yourself
How to Hardwire Dash Cam Installation Guide Step-by-step
The 5 Myths of Wi-Fi Function on Dash Cams
How to Use OTG Device with Phone to Watch, Edit and Share Dash Cam Footage
Four Factors that Affect GPS Logger Positioning Quality of Dash Cams
Five Key Points of Choosing a Dash cam for Ridesharing Taxi, Uber and Lyft Driver
Five Simple Ways To Troubleshoot Common Dashcam Glitches
Does TESLA need an additional dash cam?
Easy Installation Of 3M Adhesive Dash Cam Bracket + Static Side Film
How to Reduce Jello Effect Caused by Car Vibrations in The Footage Recorded by A Dash Cam?

